Thinking about tearing out your old tile floor? Whether it’s cracked, outdated, or just doesn’t match your new style, you’re not alone. “How to remove tile floor” is searched thousands of times each month, and for good reason.
Tile removal looks simple enough at first glance, but once the dust starts flying and the mortar proves stubborn, many homeowners realize it’s not quite the weekend project they expected. Between the noise, debris, and endless cleanup, it’s easy to see why so many people turn to JBL Flooring Solutions, South Florida’s trusted tile removal experts, to handle the job professionally.
If you’re ready to learn the right way to tackle tile removal, or just want to understand what’s involved before hiring the pros, this step-by-step guide covers everything you need to know.
Tools and Materials You’ll Need
Before you start, make sure you have the right gear. Tile removal can be messy, loud, and physically demanding, so preparation is key.
Basic Tools:
- Hammer and chisel (or pry bar)
- Utility knife
- Floor scraper
- Buckets or bins for debris
- Heavy-duty trash bags
- Shop vacuum or dust collector
Safety Gear:
- Safety glasses
- Work gloves
- Respirator or dust mask
- Knee pads
- Hearing protection
Pro Tip: For large areas or thick mortar, you’ll likely need a demolition hammer or power scraper. You can rent these from a local hardware store, but be warned, they require experience to control safely.
Step-by-Step: How to Remove Tile Floor
Step 1: Prepare the Area
Clear the room of furniture and cover nearby vents, doors, and surfaces with plastic sheeting. Tile removal creates fine dust that travels quickly through your HVAC system, so containment is critical.
Step 2: Remove Trim and Baseboards
Gently pry away any baseboards or transition strips along the walls. This exposes the full edge of your tile flooring, making it easier to start removal.
Step 3: Start at a Weak Spot
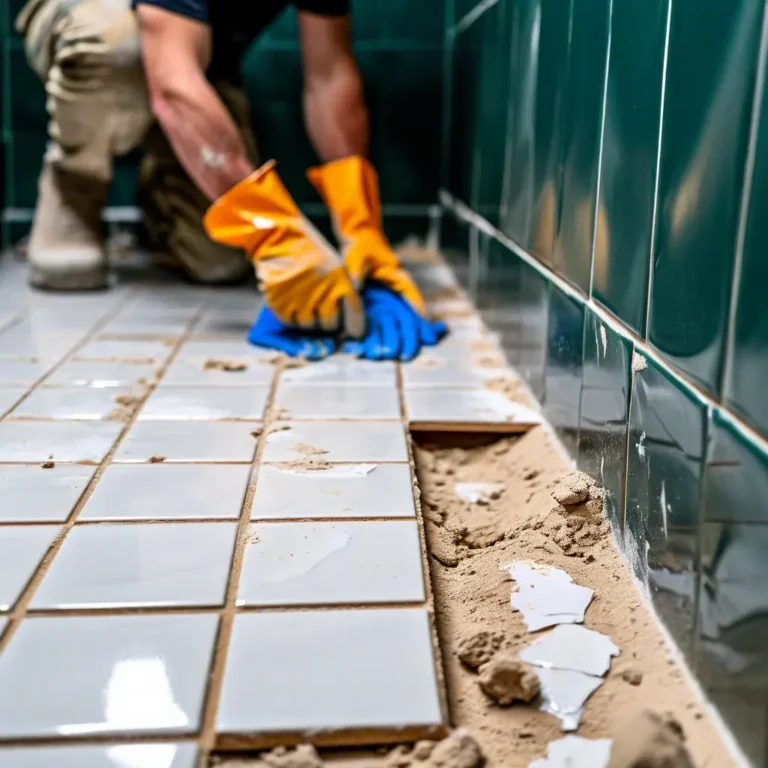
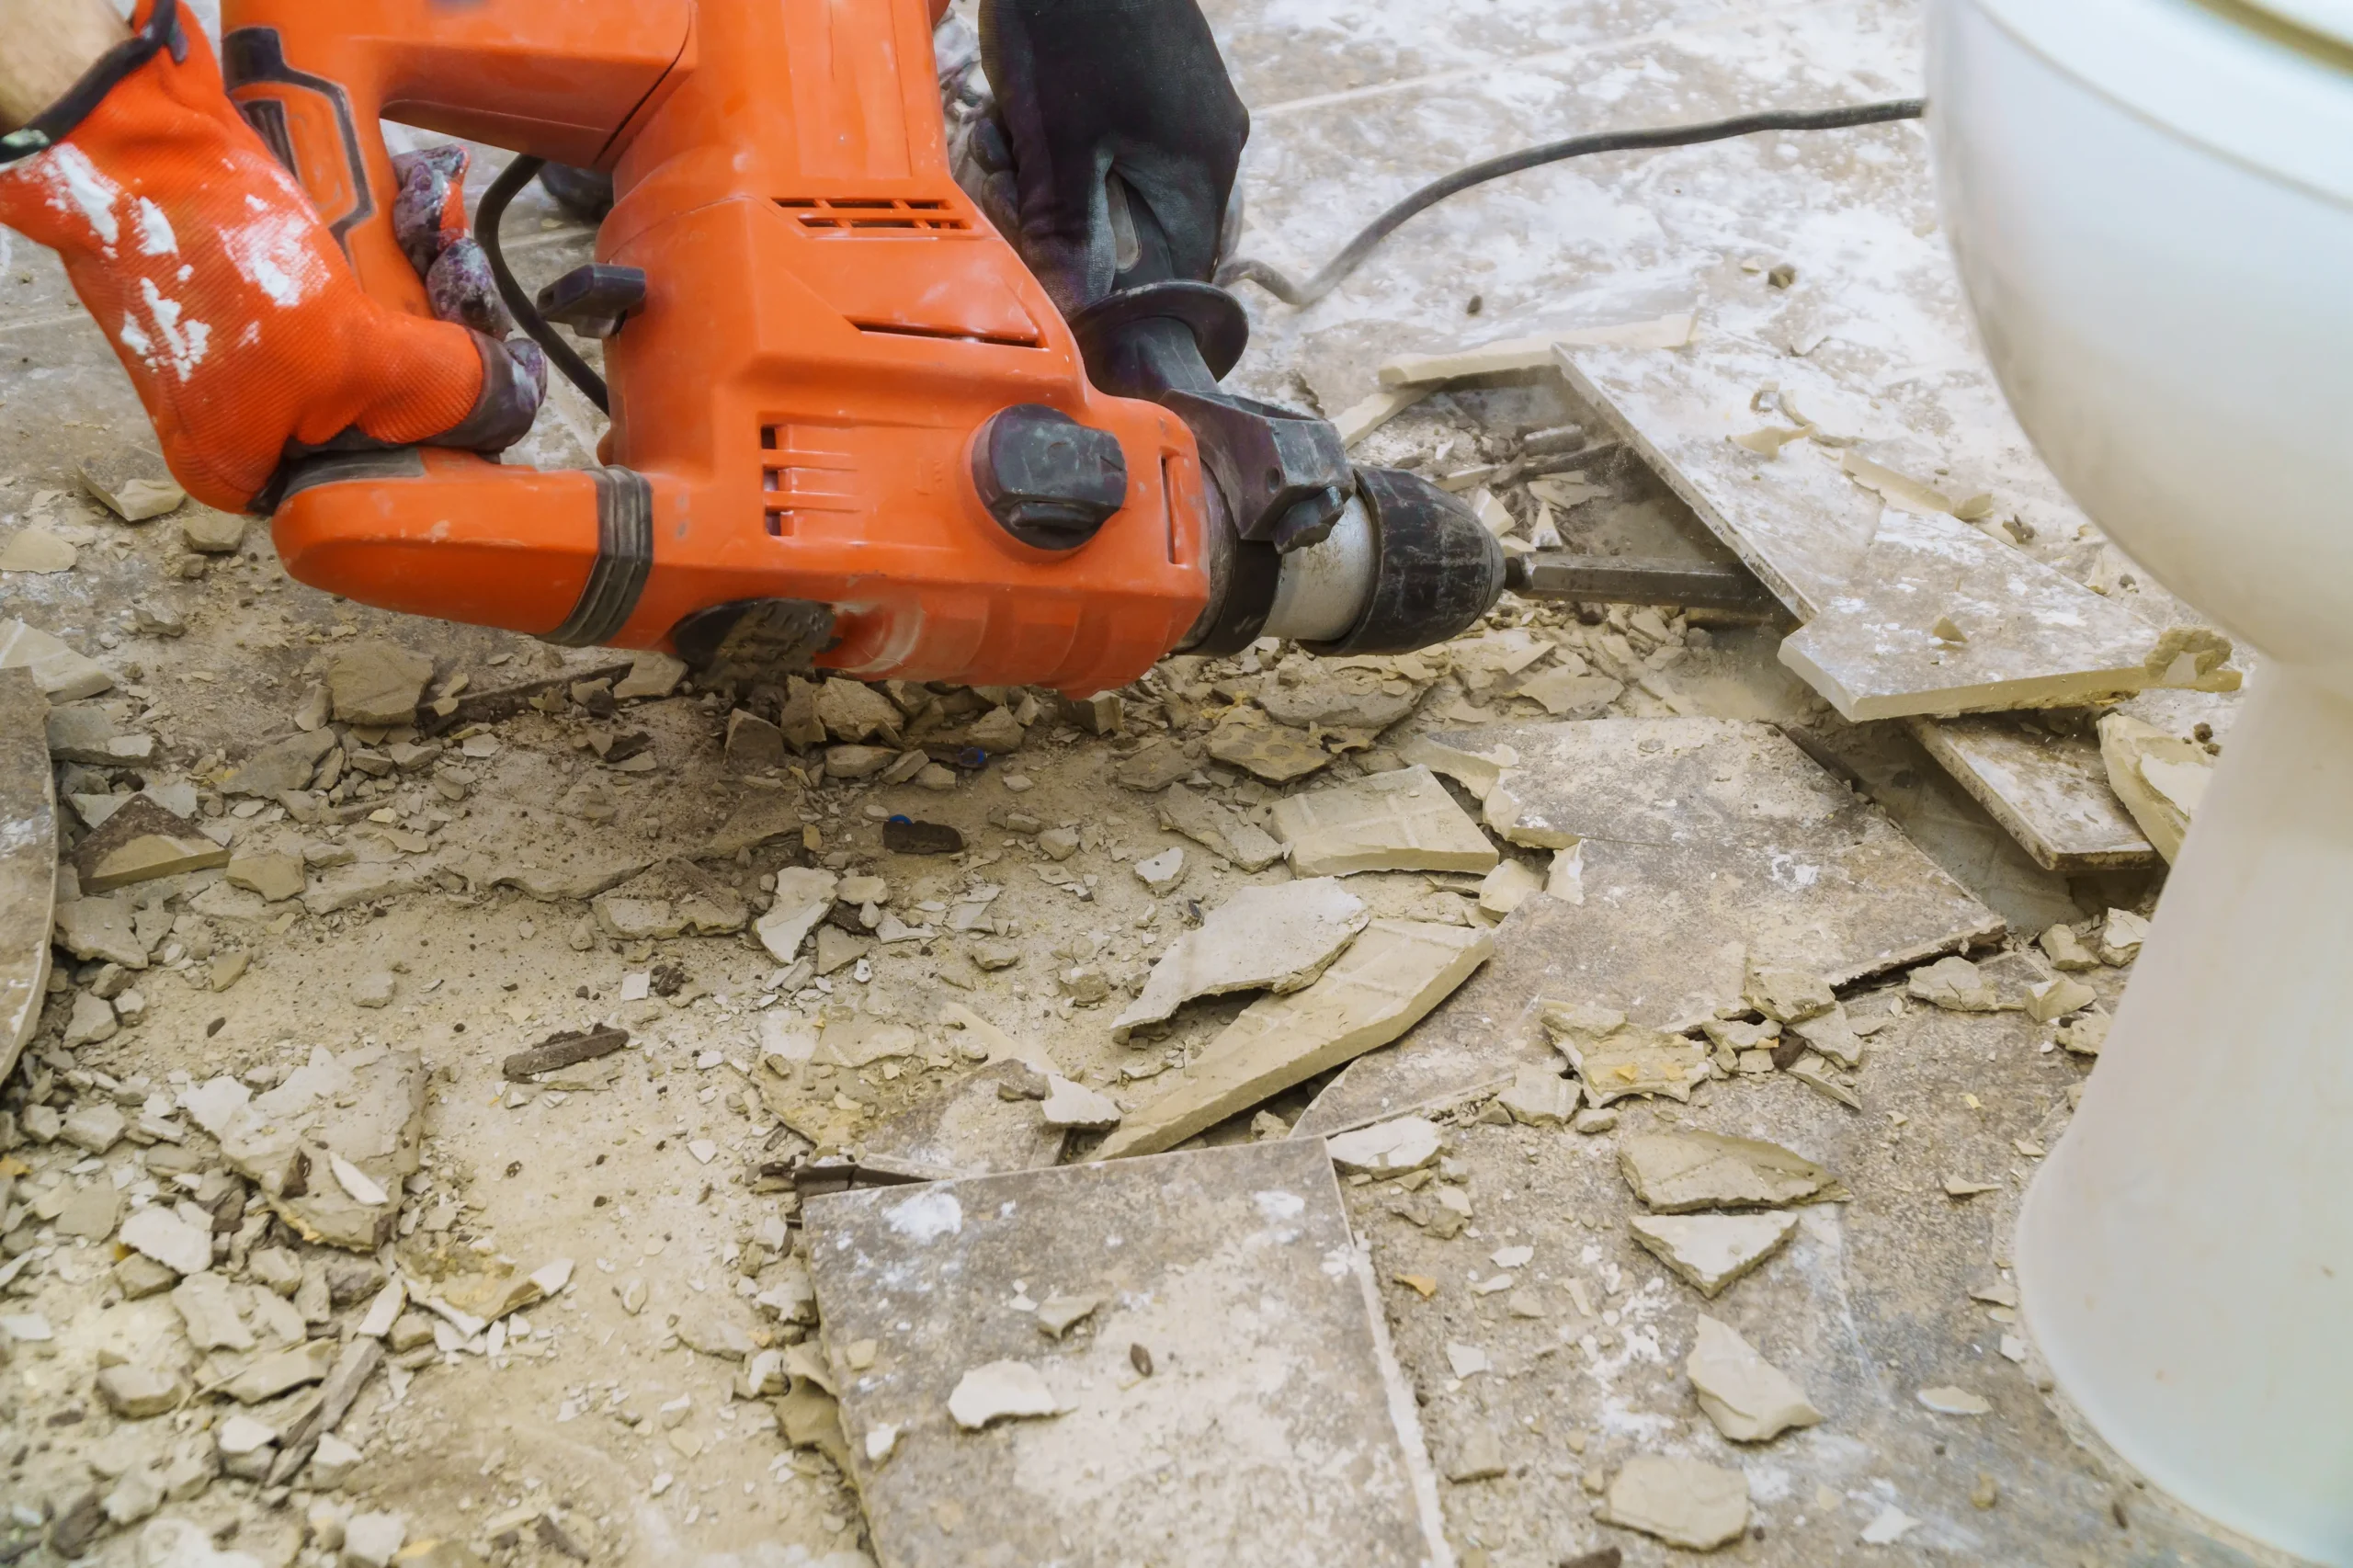
If you have a cracked or loose tile, begin there. Use your chisel and hammer to lift the first tile and create an opening. For intact floors, use the hammer to break the first tile into smaller pieces.
Step 4: Pry Up the Tiles
Once you have an opening, use a floor scraper or pry bar to remove surrounding tiles. Work in small sections and apply consistent pressure. Rushing this step can damage the subfloor underneath.
Step 5: Remove Mortar or Thinset
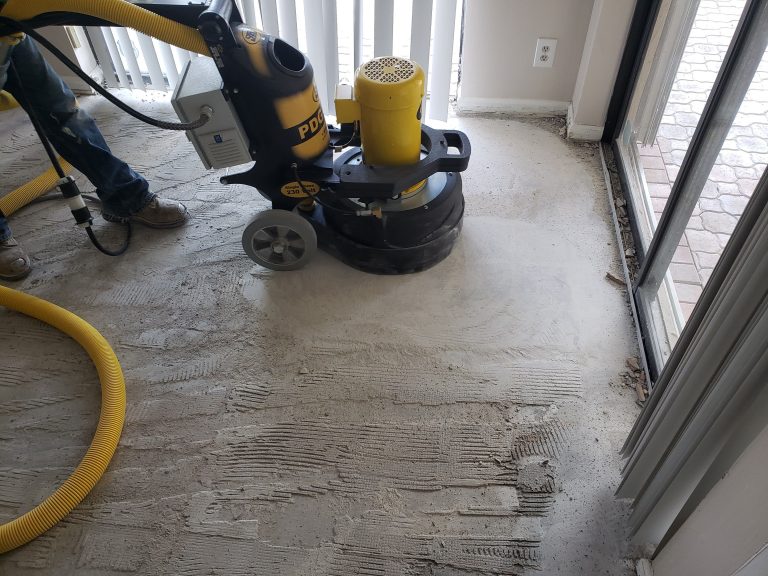
After the tiles are gone, you’ll likely see a layer of hardened mortar or thinset. This part takes patience. Use a grinder or scraper to remove all remaining material until the surface is smooth and level.
Warning: This step creates a lot of dust. Open windows, wear a respirator, and take breaks to clear the air, or you’ll be cleaning for weeks.
Step 6: Clean Up the Debris
Vacuum the entire area, including corners and edges. Check for any nails, adhesive residue, or damage to your subfloor before laying new flooring.
Common Mistakes Beginners Make
Even with careful planning, first-time DIYers often run into these problems:
- Underestimating the Dust: Tile removal dust is fine, abrasive, and gets everywhere, even inside electronics.
- Damaging the Subfloor: Using the wrong angle or too much force can gouge wood or crack concrete.
- Skipping Proper Safety Gear: Gloves and goggles aren’t optional, flying shards are dangerous.
- Time Misjudgment: A small 200-square-foot kitchen can take a whole weekend (or longer) to complete by hand.
If any of this sounds overwhelming, that’s because tile removal is one of the toughest parts of any renovation.
How the Pros Remove Tile Floors (and Why It’s Worth It)
Professional crews, like those at JBL Flooring Solutions, use specialized equipment to make tile removal fast, clean, and efficient.
Here’s what separates pros from DIY:
- Dust-Free Technology: HEPA-filtered vacuums and dust shrouds capture particles before they spread.
- Speed and Efficiency: Commercial-grade machinery can remove hundreds of square feet per day.
- Subfloor Protection: Experienced technicians prevent damage and prepare your floor for perfect installation.
- Complete Cleanup: No leftover debris, no lingering dust. Just a smooth, ready-to-use surface.
DIY vs. Professional Tile Removal: What’s Best for You?
If you’re removing tile from a small bathroom or closet, a DIY approach might work with enough time and patience. But for larger rooms, occupied homes, or anyone sensitive to dust, hiring a pro is the smarter move.
| Scenario | DIY | Professional |
|---|---|---|
| Small Room (Under 100 sq ft) | Possible | Faster, cleaner |
| Large Area (200+ sq ft) | Time-consuming | 1-Day Completion |
| Whole Home or Business | Unrealistic | Dust-Free Efficiency |
| Need for Perfect Subfloor | Difficult | Guaranteed |
For most homeowners, the cost of hiring pros is quickly offset by the time saved, the reduced cleanup, and the assurance that your floors will be ready for new installation without extra prep.
Skip the Mess – Let JBL Handle the Heavy Lifting
If the idea of spending your weekend with a chisel and shop vac doesn’t sound appealing, you’re not alone. Many homeowners start DIY and quickly realize it’s far more work than they expected.
That’s why locals trust tile removal company JBL Flooring Solutions. We specialize in dust-free tile removal using commercial-grade tools and HEPA filtration systems that keep your home spotless.
Whether it’s a small bathroom, a large kitchen, or a full property renovation, our team works quickly, efficiently, and with total respect for your home.
Contact us today for a free quote and let us handle the mess while you plan your brand-new floors.